Earlier in the season we received an intriguing request from 30Edesign, a local architecture design and construction company; to create a mosaic of an artist’s work using chocolate “tiles” for their Annual Valentine. Normally when we are asked to create a custom design on a chocolate, it is usually just one image such as a business logo or letters. We use a transfer that is custom printed with colored cocoa butter on food grade acetate sheets. The transfer is the size of the top of the bonbon and is placed on to the chocolate right after it is enrobed while still wet. Once the chocolate sets the acetate sheet is peeled off and the colored cocoa butter print is left behind. We realized that this would not work for this particular project for several reasons. The colors available for transfers are very basic and this artwork had very nuanced colors. The image itself is complex in that it has a great deal of shading and fades that would not be adequately translated. Custom transfers are typically ordered in sets of 25 sheets with approximately 70 pieces per sheet and each piece would be the same artwork / image so we would end up with thousands of transfers.

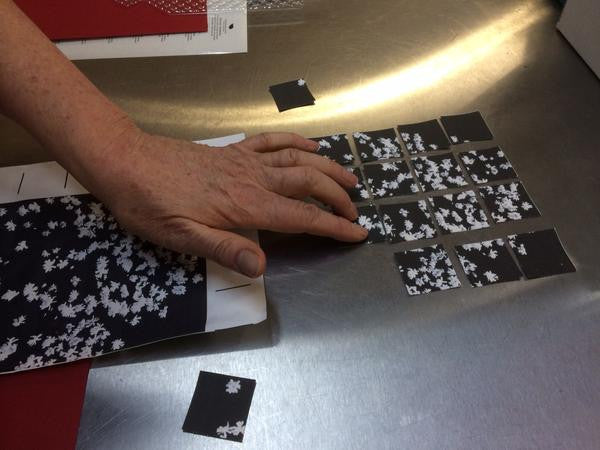
We found that we could have the actual image printed on frosting paper (used on cakes) and we would cut them at the kitchen into the smaller tiles. Frosting paper can come in a couple of different materials, potato starch and rice paper. We tasted samples of each on their own and then on top of one of our bonbons. Out of the two, potato starch was the least disturbing in flavor, and once it was combined with the bonbon, was not noticeable at all in terms of flavor and texture. Once we decided on the material, we had to decide what size we needed the image to be in order to fit in the box we planned to use as well as how large each tile would need to be to cover the bonbon properly. After several missed starts, we created an image that would be divided evenly into 4 tiles across, 5 tiles down, for a total of 20 tiles for the mosaic.

Once the frosted sheets arrived, we realized that cutting them posed another challenge as they had to be precisely done. A test cut revealed that 1) there is plastic on the back of the frosted sheet that needs to be removed and actually is not so easy (surprise!), 2) once removed from the protective silver bag that they came in, they dry out very quickly and start to shatter (cut apple in air tight container works wonders in keeping things moist), and 3) no matter how organized we thought we were in keeping the little tiles in order, we still had trouble putting all of them back in the right spot to make the image (bonbon trays for organization, channeling Martha!)


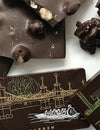
Once all of this was sorted out, we thought we were in good shape and started running a test batch of ganache through Lucie (our enrobing machine) and tried to place and center the tiny little squares of frosting sheet on top of each enrobed chocolate. We realized that we needed to firm up our ganaches a bit more than usual so that they could be cut with very clean even edges by the guitar so our recipes were adjusted. Our next test batch worked beautifully and we were ready to start. We went with 5 flavors, 4 of each.

Finally, to package the pieces in the box, we ended up building inserts from cardstock and candy pads so that the artwork would fit snugly and would travel well without shifting or damage.


Overall, a “work” of art! We’re thrilled with the results! Contact us to place a custom order for your next occasion.